
Introduction
When I bought my Chery EV, one of the first things I wanted was to integrate the supplied TellusPower charger into Home Assistant. Surprisingly, there was almost no information available online.
The good news is that the charger supports the Open Charge Point Protocol (OCPP), which means you can connect it directly to Home Assistant without relying on the manufacturer’s cloud.
After quite a bit of testing (and plenty of debugging), I managed to get everything working reliably. In this guide I’ll show you exactly how I configured it, the pitfalls I encountered, and the settings I recommend for TellusPower Home Assistant.
What is OCPP?
OCPP (Open Charge Point Protocol) is an open standard used by EV chargers to communicate with central management systems.
Without OCPP, your charger normally communicates only with the manufacturer’s cloud. Home Assistant has no direct control. OCPP changes that by allowing Home Assistant to act as the charging server, giving you local control with no cloud dependency.
This provides several benefits:
- Local control without cloud dependency
- Real-time charger status
- Live power and energy monitoring
- Remote start and stop charging
- Dynamic current control
- Home Assistant automations
- Solar charging integration
What You Can Do With the Integration
With this integration, you will unlock the following features / capabilities:
| Feature | Supported |
| Start Charging | ✅ |
| Stop Charging | ✅ |
| Charging Power | ✅ |
| Energy Usage | ✅ |
| Dynamic Current | ✅ |
| Smart Charging | ✅ |
| Firmware Info | ✅ |
| Battery SoC | ❌ (Vehicle doesn’t expose it through OCPP) |
Many people expect the charger to know the vehicle’s battery percentage. Surprisingly, this information is not normally provided over OCPP. The charger only knows how much power it is delivering, not the vehicle’s actual battery state.
To obtain the battery SoC, you’ll need to communicate directly with the vehicle rather than the charger. You can do that by following the following Blog article: How to Integrate Your Chery Tiggo 8 PHEV with Home Assistant
Tested Hardware and Software:
| Item | Details |
| Charger | TellusPower |
| Protocol | OCPP 1.6J |
| Home Assistant | Local OCPP server |
| Connection | WebSocket |
| Cloud required | No |
| Dynamic current | Yes |
| Energy monitoring | Yes |
| Vehicle SoC via OCPP | No |
| Tested firmware | 001238 |
Requirements
Before starting, you’ll need:
- Home Assistant
- HACS installed
- The OCPP Integration installed from HACS
- A TellusPower charger with OCPP 1.6 support
- Your charger connected to the same network as Home Assistant (recommended)
Install OCPP in Home Assistant
Enabling Debug Logging in Home Assistant
This may not be necessary, but I found that this helps troubleshoot connectivity issues and made monitoring the initial operation a lot easier:
Enable debug logging by adding the following to configuration.yaml:
logger:
  default: info
  logs:
    custom_components.ocpp: debug
Restart Home Assistant.
The logs now include every OCPP message exchanged between Home Assistant and the charger, making troubleshooting significantly easier.
Installing OCPP on HACS
Search for and install the OCPP integration from HACS and restart Home Assistant.
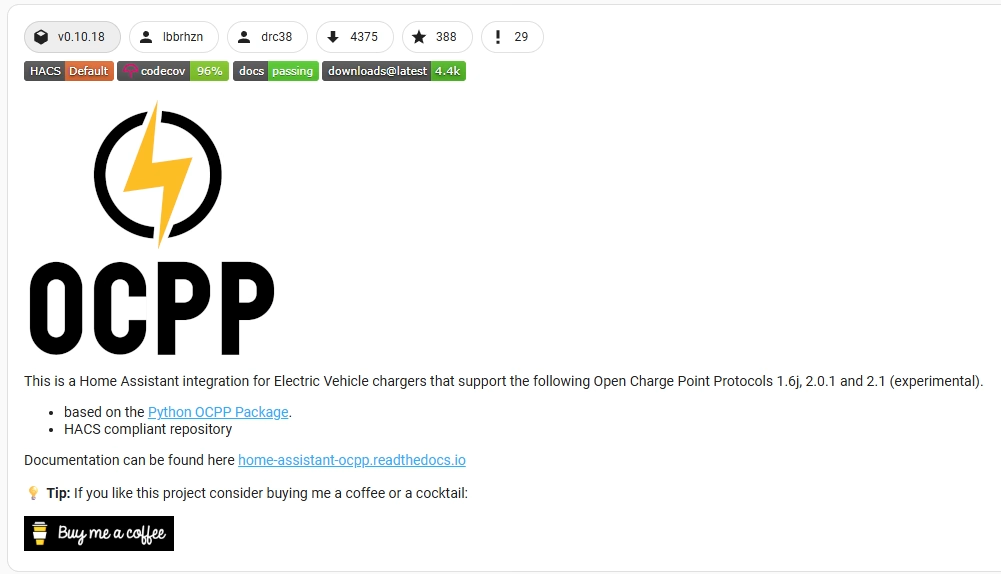
After restarting:
- Go to Settings → Devices & Services
- Select the “+Add Integration” from the bottom right
- Add the OCPP integration
- Configure the server
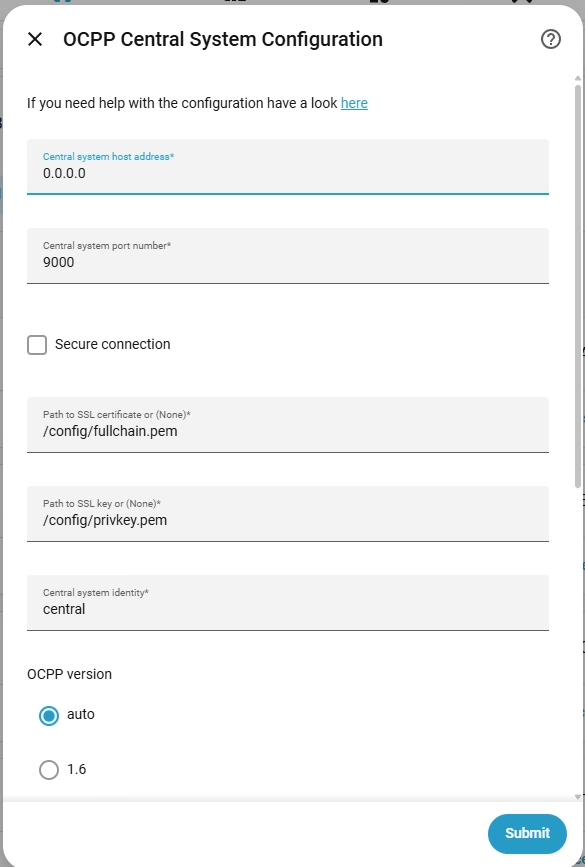
Typical settings are:
- Host: 0.0.0.0
- Port: 9000
- Protocol: OCPP auto
- Protocol: OCPP Auto
- The TellusPower charger uses OCPP 1.6J. The integration can automatically negotiate the appropriate protocol, so I left this setting at Auto.
Once configured, Home Assistant will begin listening for incoming OCPP connections.
Configuring the TellusPower Charger
Using the charger’s application you can configure the IP details that the charger needs to communicate with. This will be the private IP address of your Home Assistant instance.
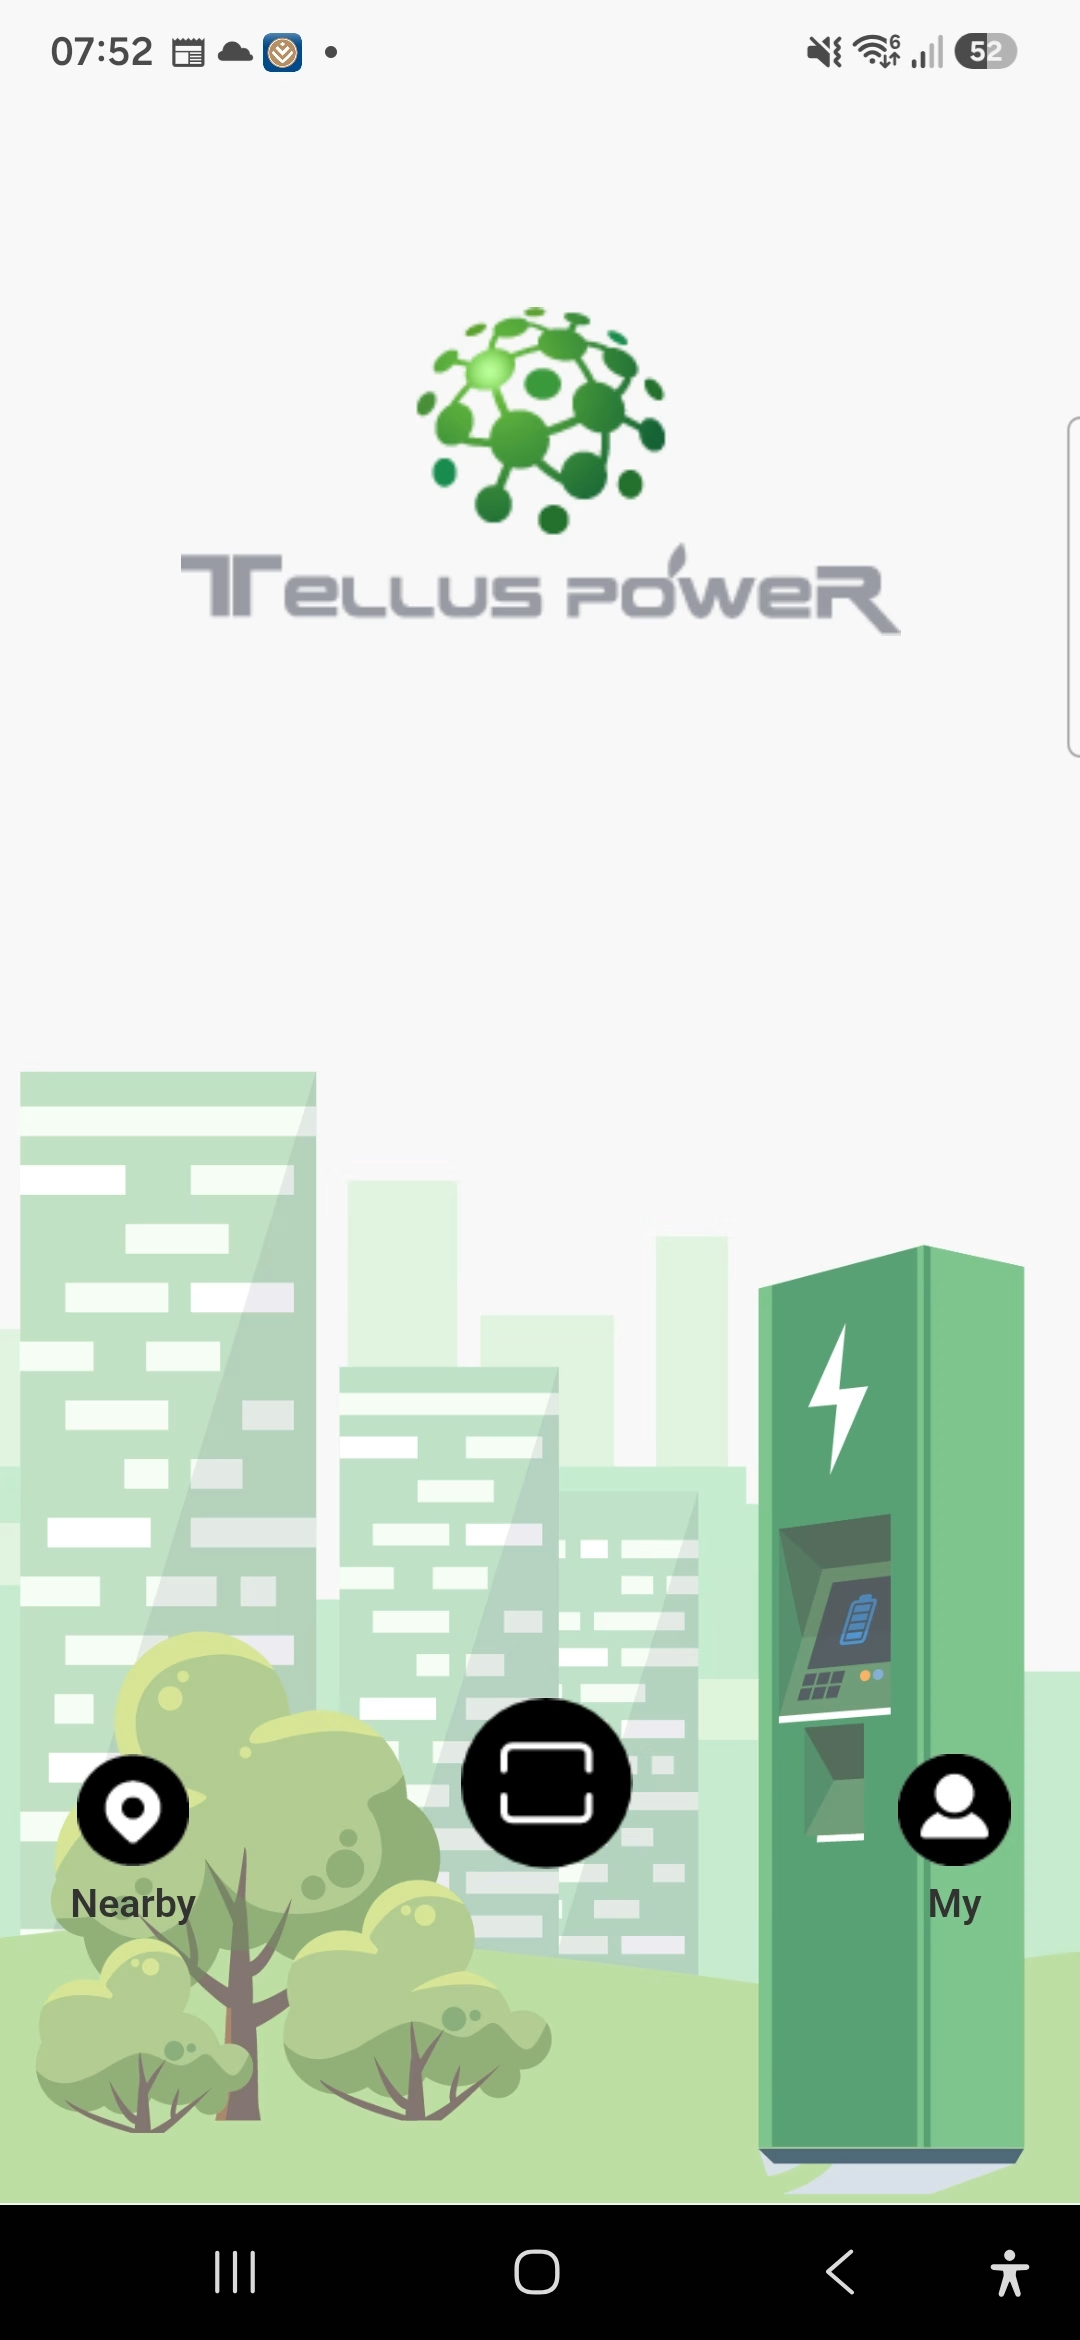 | The TellusPower Main screen. From here Select the “My” Icon at the bottom right. |
| Here you need to select Bluetooth: | 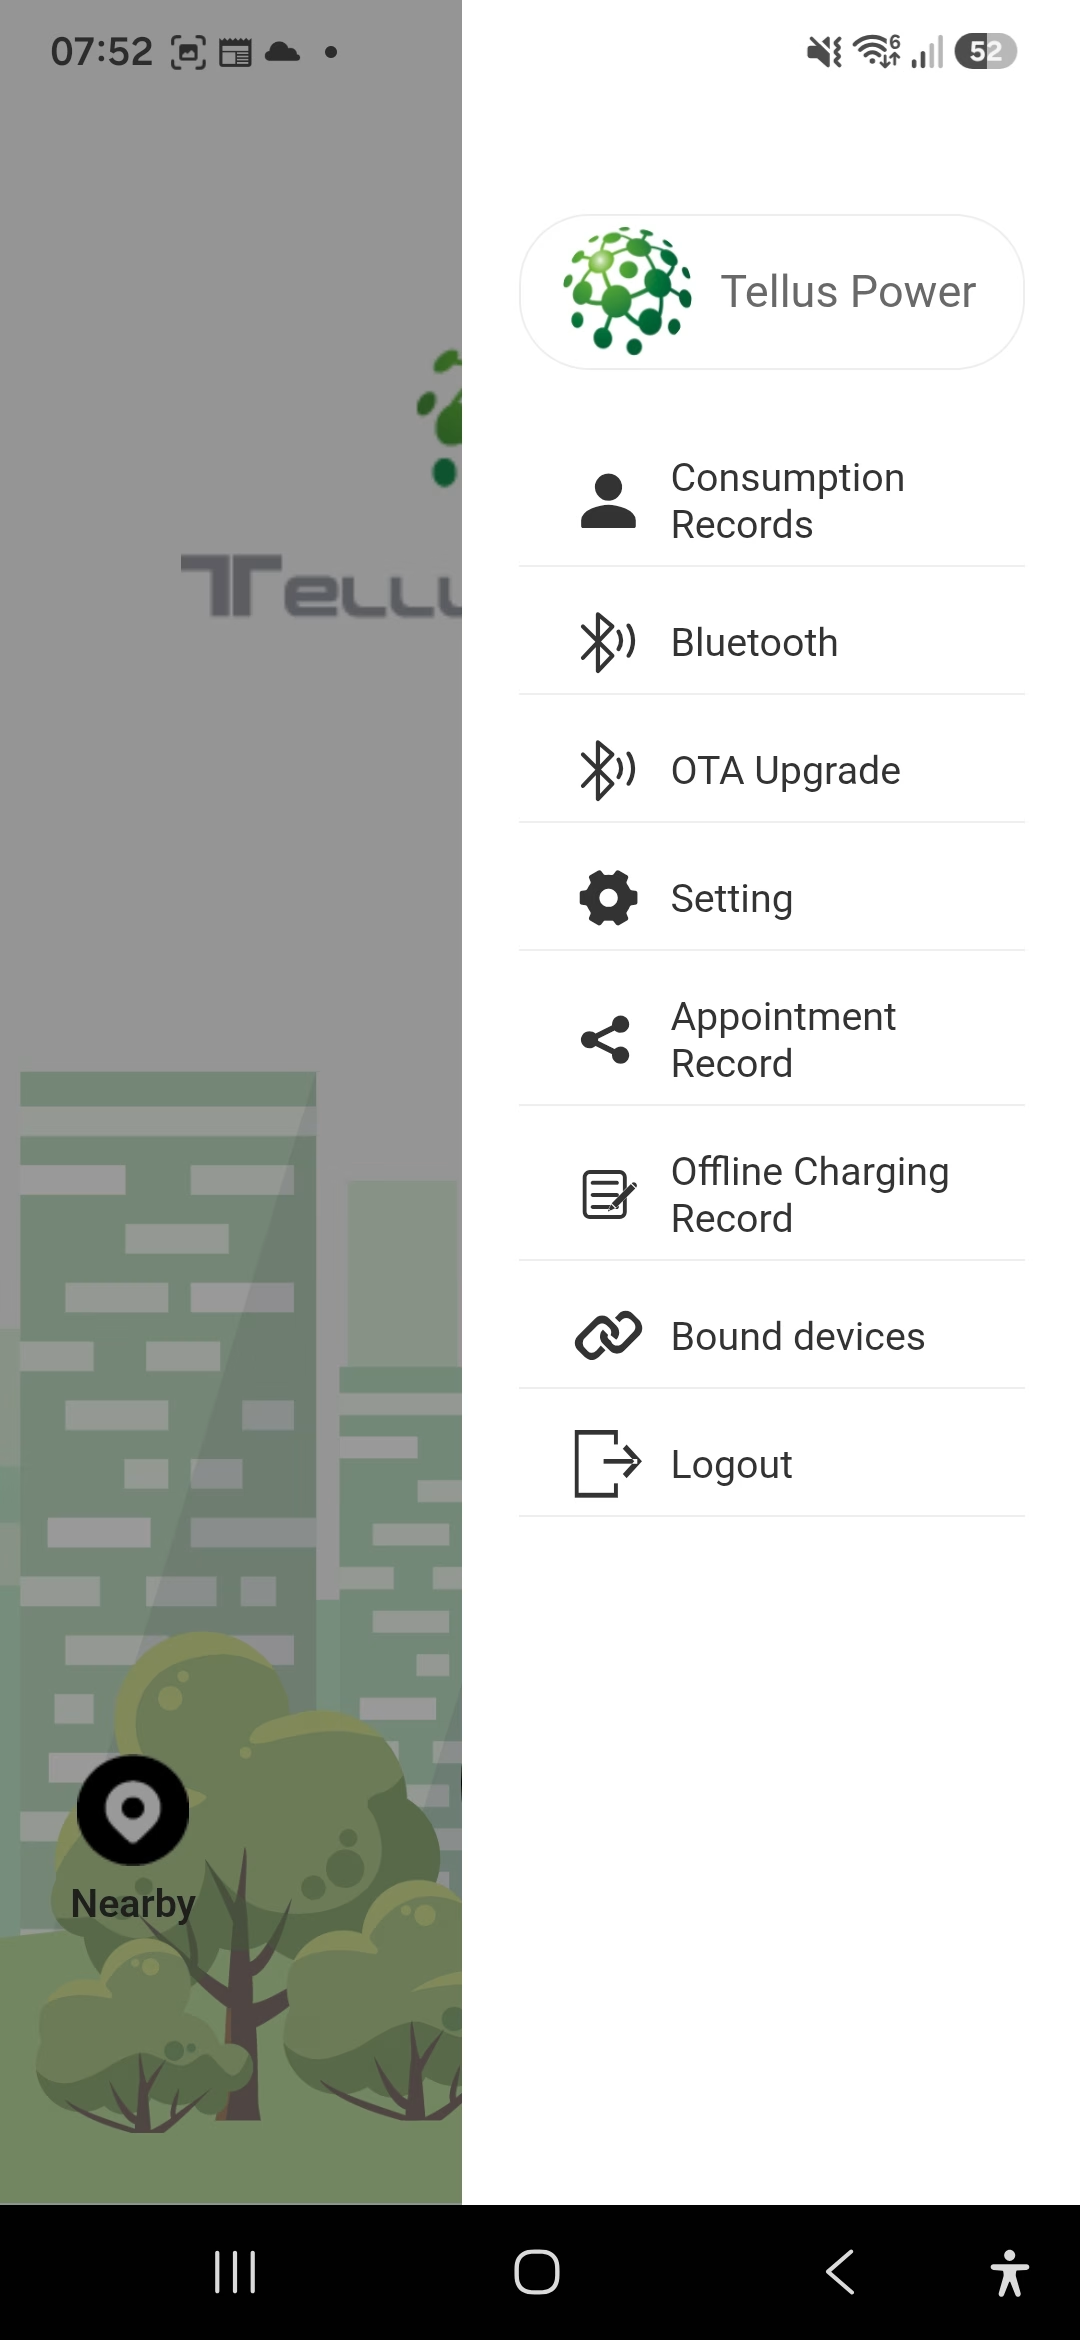 |
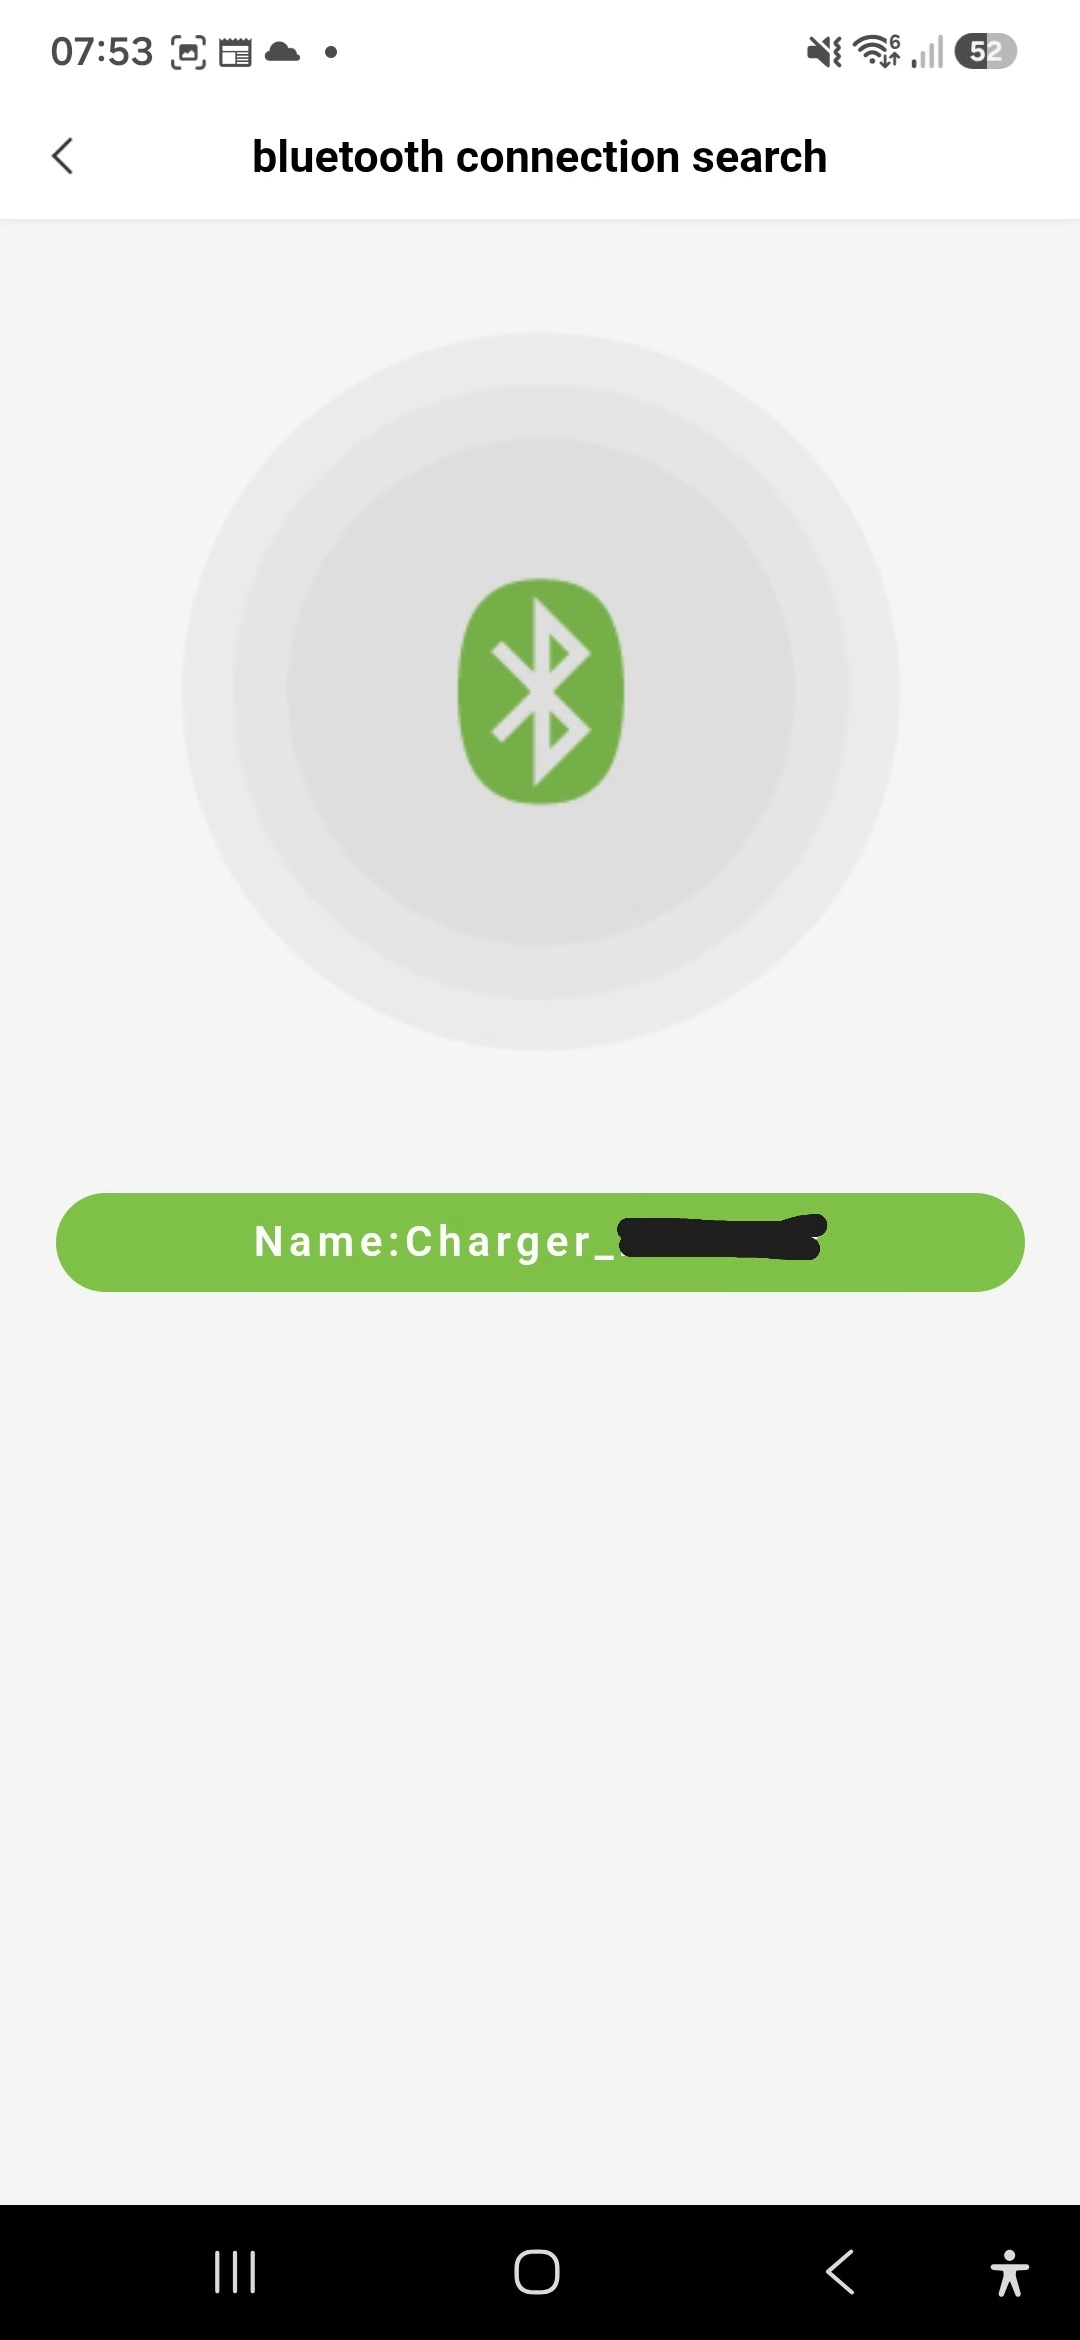 | If your phone is within range of the charger, the charger will be displayed. Select it to open the charger page |
| This is the main Charging screen of the App. From this page you can start / stop charging, or configure the charger settings. To configure the connection to Home Assistant, select Network: | 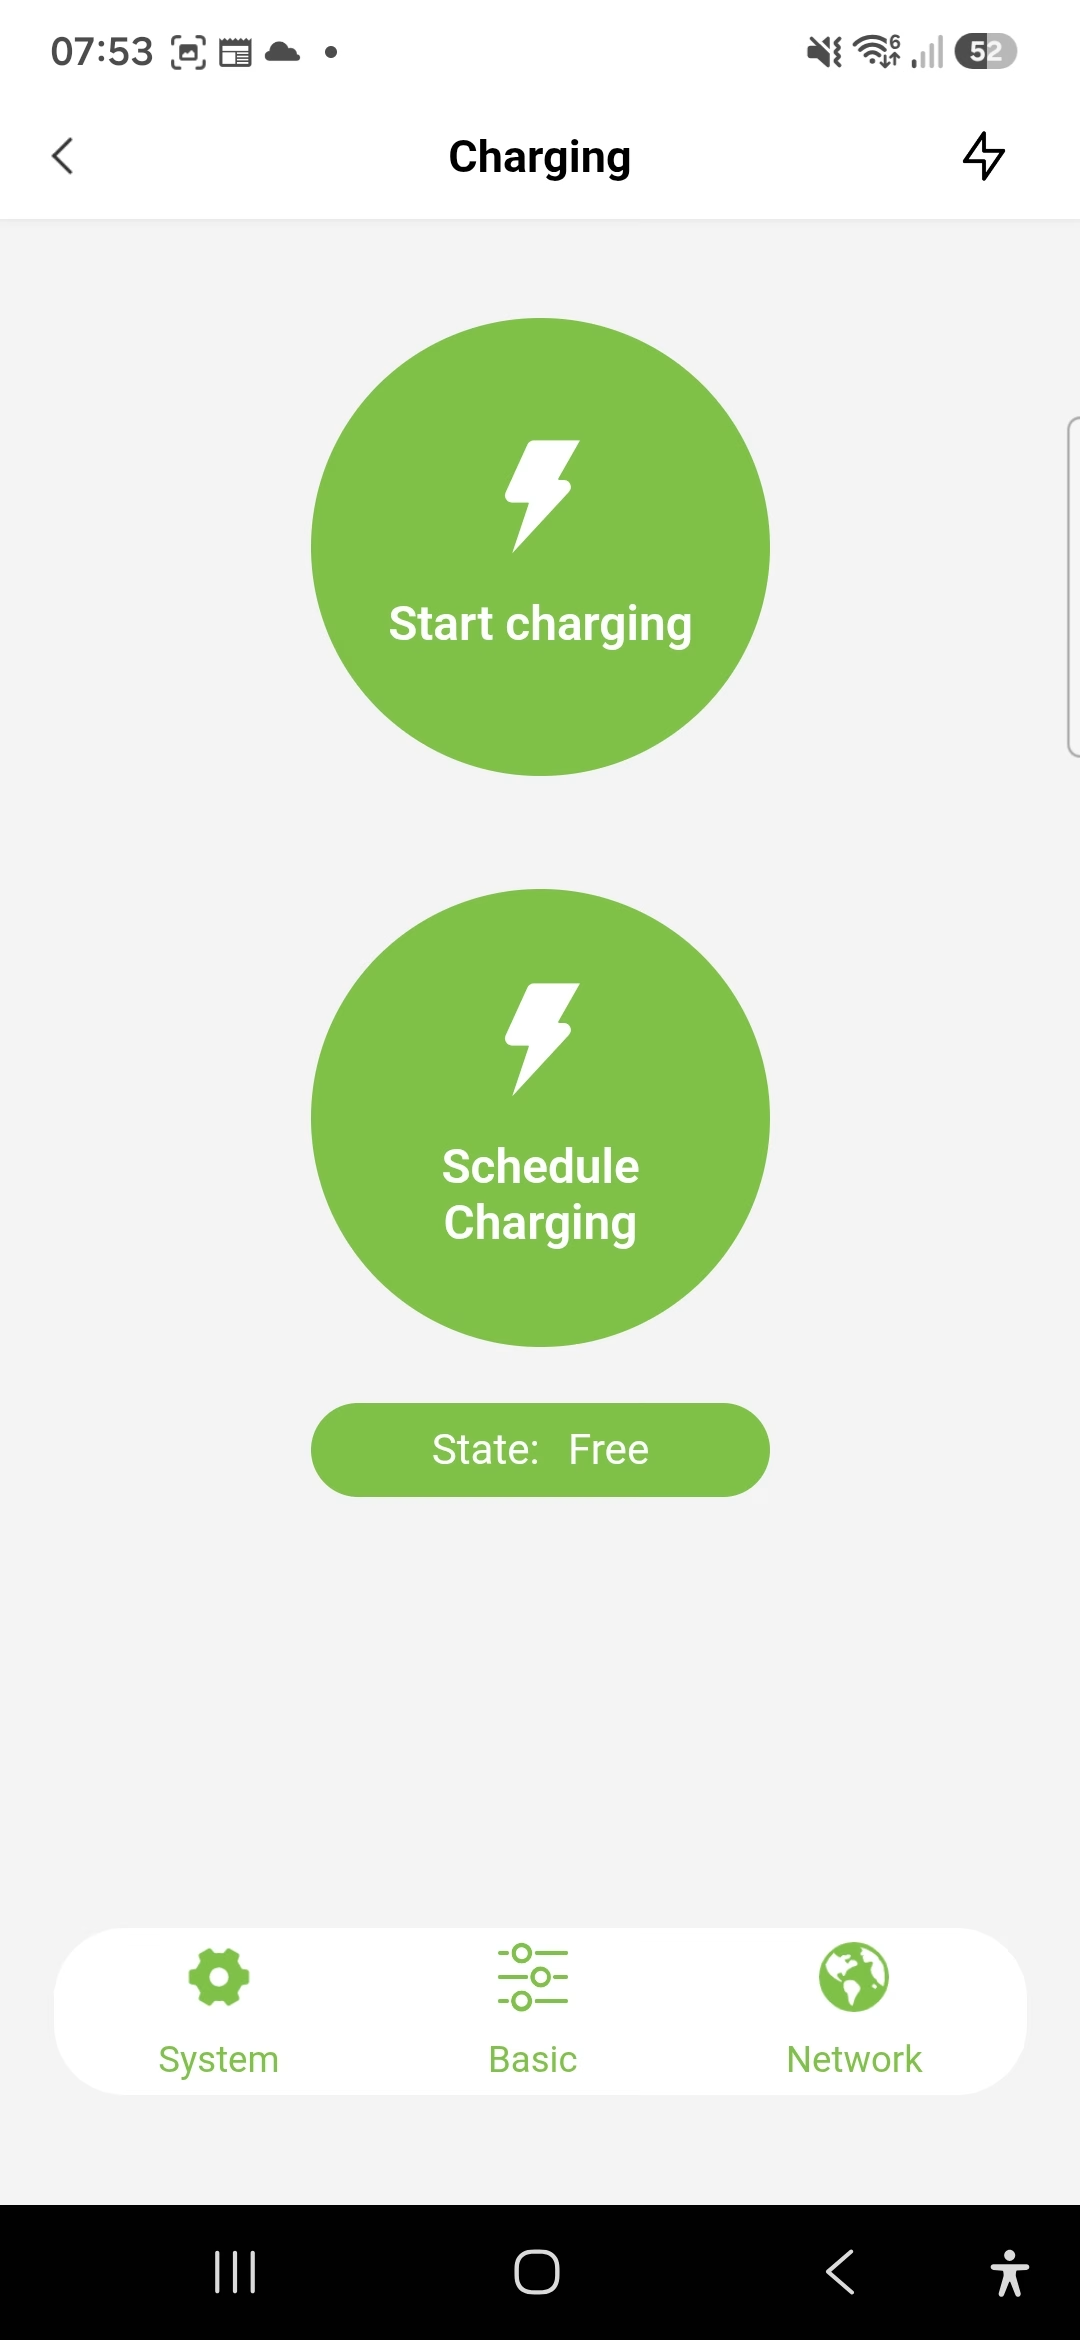 |
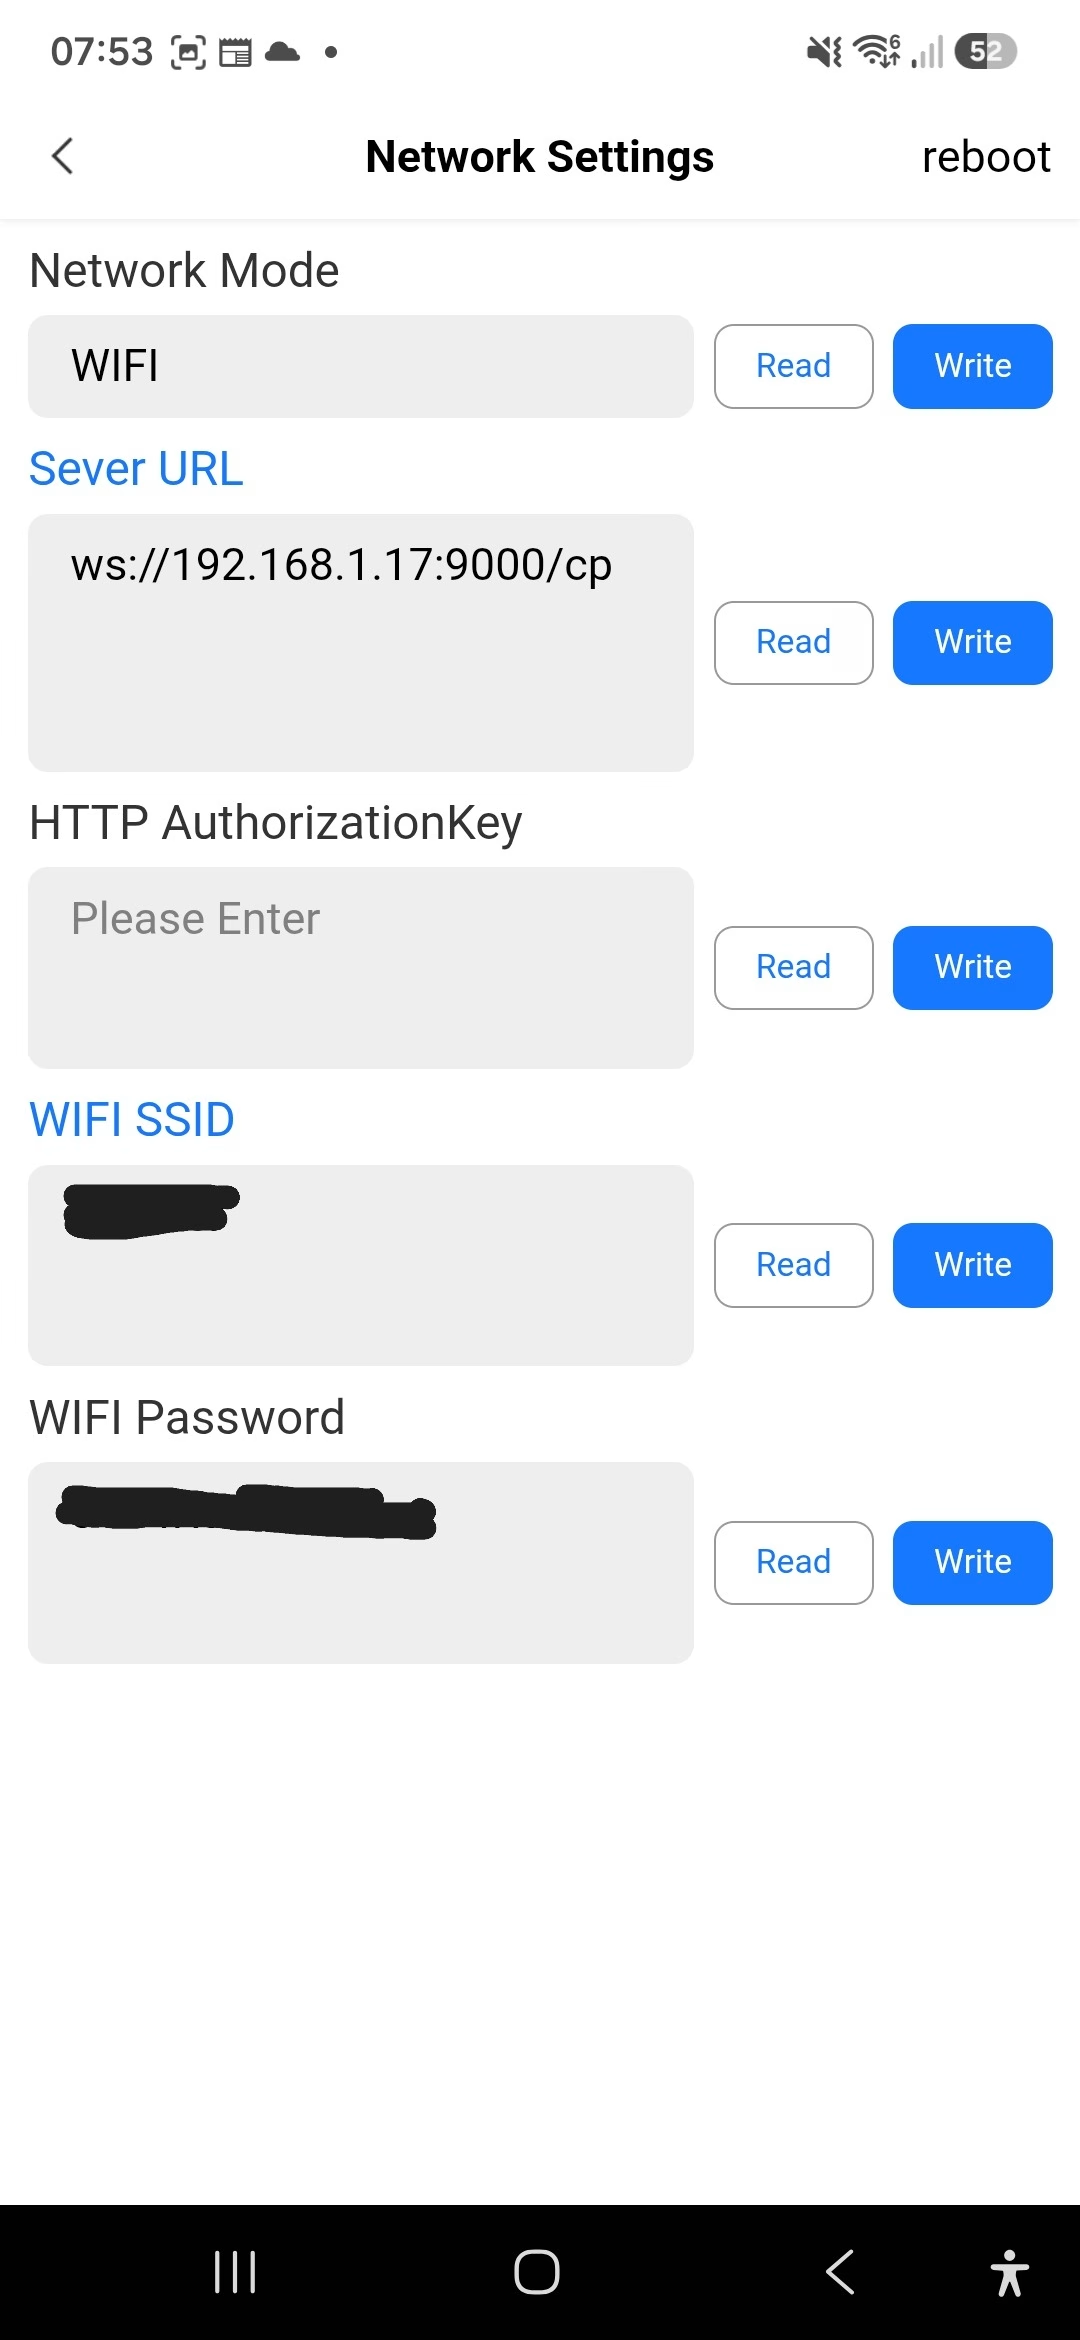 | On the TellusPower Network screen you should already have your WiFi SSID and WiFi Password configured. Now you need to update the Server URL to point to the local IP Address of your Home Assistant Instance. (If asked for a password, it’s normally 123456) |
| An optional step, and to ensure I do not overpower my inverters, I also changed the Rated Current and Maximum Current to 25A. Recommended Safety Setting:I also reduced the Rated Current and Maximum Current to 25A. This isn’t required for the OCPP integration itself, but I recommend considering a suitable maximum for your installation.I found that if the charger encounters a configuration problem and reboots, it can revert to its configured maximum current. Setting an appropriate maximum provides an additional safety margin and prevents the charger from suddenly drawing more current than intended. | 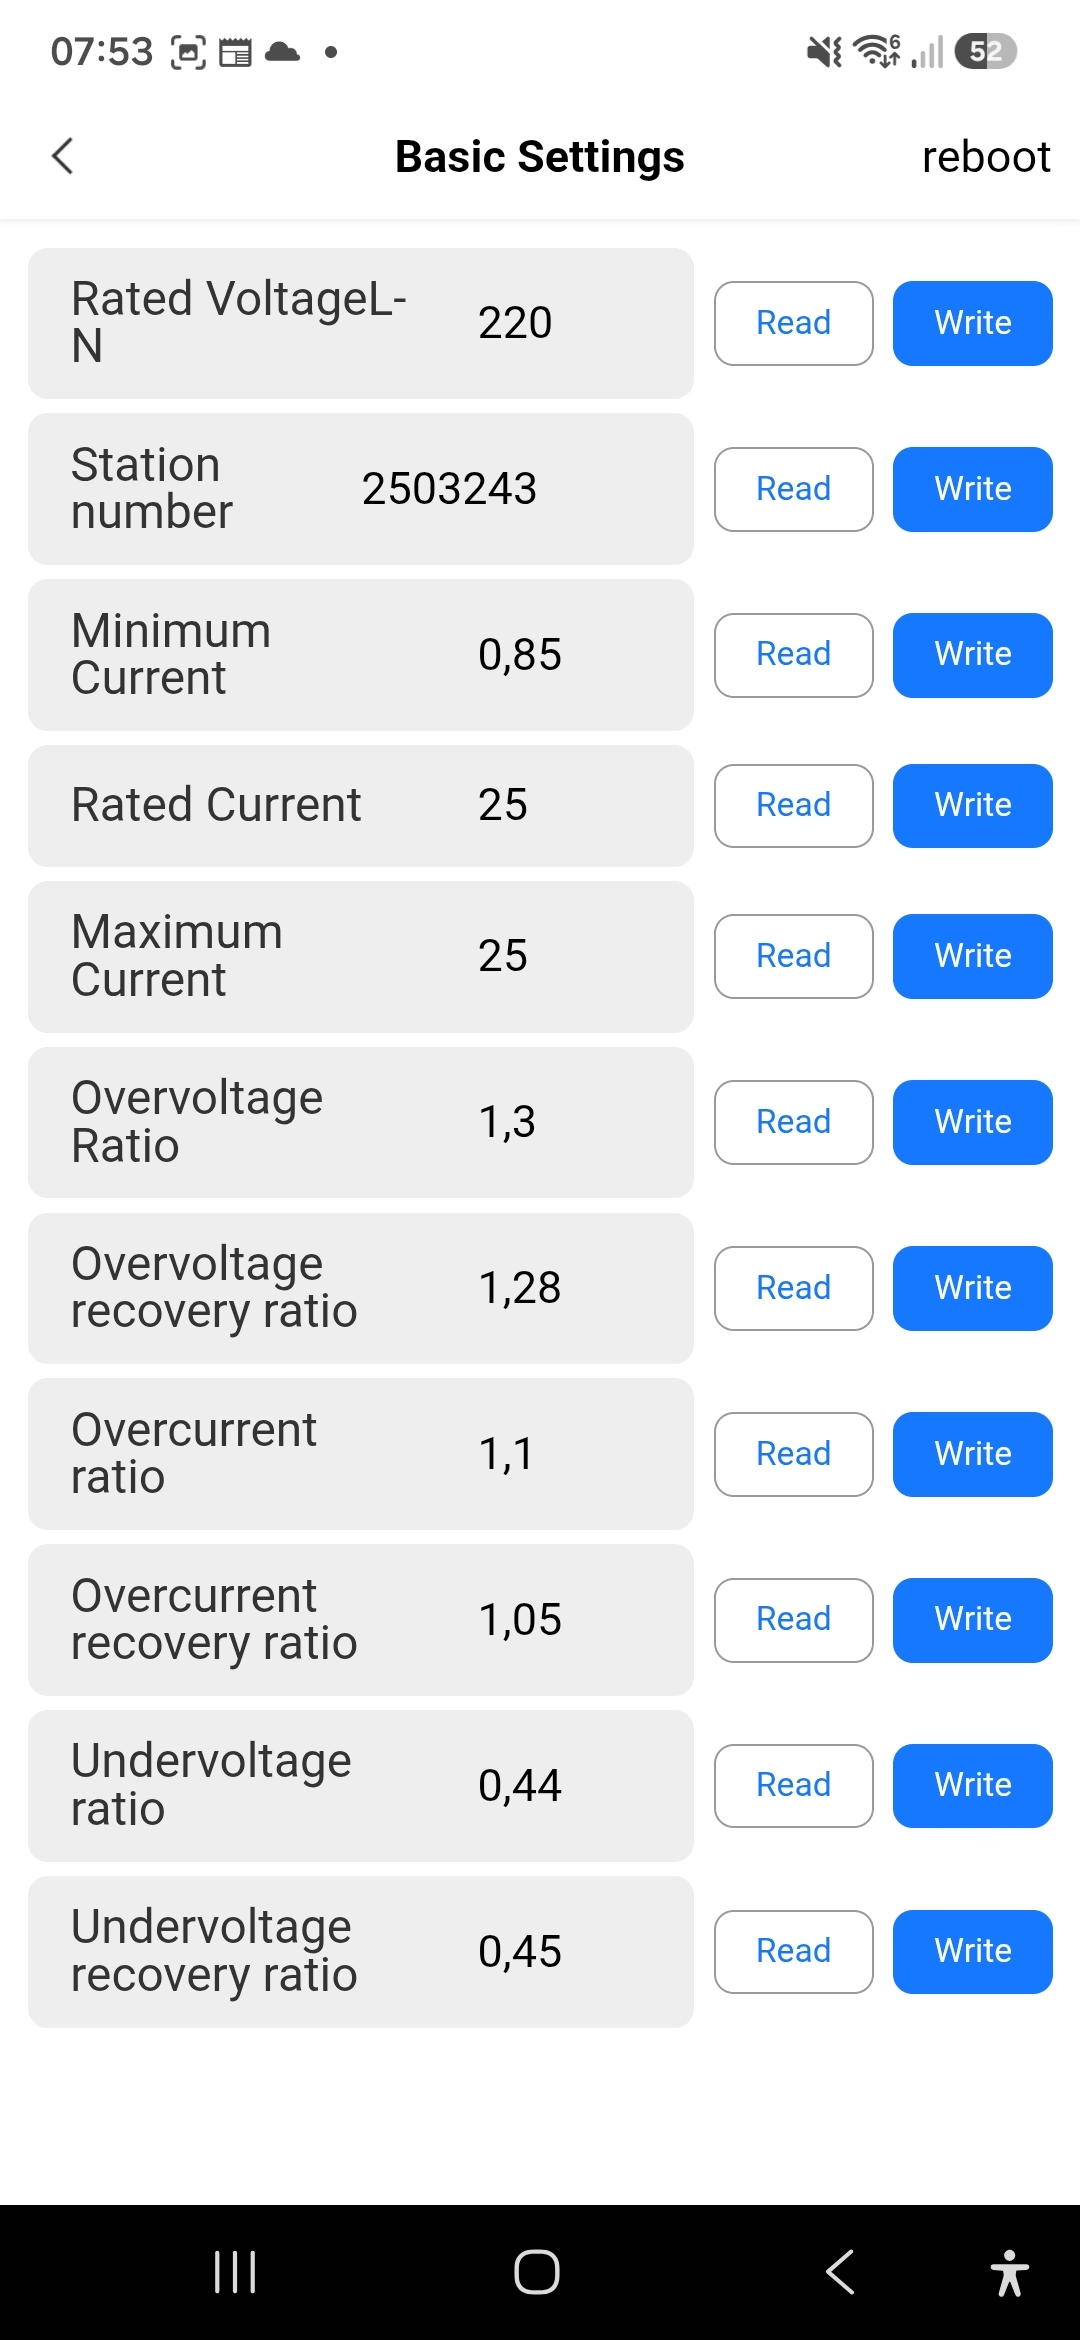 |
Server URL example:
ws://192.168.1.xxx:9000/cp
Replace:
- 192.168.1.xxx with your Home Assistant private IP address.
Important: The exact URL format may depend on the version of the TellusPower charger firmware and the OCPP integration. Use the Charge Point ID shown by your charger when required.
After saving the settings, hit Reboot on the top right of a setting page. The charger should reboot and connect to Home Assistant.
Don’t expose the OCPP port directly to the Internet.
The setup described here is intended for a local network. There is normally no reason to expose port 9000 to the public Internet. If remote access is required, use a secure VPN or another appropriate secure access mechanism rather than simply forwarding the OCPP port.
Verifying the OCPP Connection
If everything is configured correctly, the Home Assistant log should show a successful boot notification. You can tail the logs in command line and look for ocpp specific commands by executing this in the Home Assistant Terminal: (This will only work if Debug logging was enabled in the earlier step)
ha core logs -f | grep ocppLook for the Boot notification from the Charger:
BootNotification
status = Accepted
Home Assistant will then automatically retrieve information such as:
- Charger vendor
- Model
- Firmware version
- Supported OCPP feature profiles
- Number of connectors
- Heartbeat
For our TellusPower charger, Home Assistant successfully detected:
- Vendor: TellusPower
- Model: DualPortLevel2
- Firmware: 001238
- Supported Features:
- Core
- Firmware Management
- Smart Charging
- Reservation
- Remote Trigger
- Local Authorization List
Add the Charger to Home Assistant
Once your TellusPower charger has connected to the OCPP integration, Home Assistant will detect a new charger and start the configuration wizard.
One of the most important configuration steps is selecting which measurands Home Assistant should request from the charger.
Although it is tempting to enable every available measurand, I found that doing so prevented the integration from operating reliably.
During testing, requesting every supported measurement caused the charger to repeatedly reconnect and the OCPP initialization sequence never completed successfully.
Recommended Measurands
Instead of selecting every available option, only enable the measurements you actually intend to use.
For most Home Assistant dashboards and automations, the following are sufficient:
- Energy Active Import Register
- Current Import
- Voltage
These provide everything needed to monitor:
- Charging power
- Energy delivered
- Charging current
- Supply voltage
One thing that I did not get via this interface is the battery SoC (State of Charge). The TellusPower charger does not expose the vehicle’s SoC through the OCPP data available to Home Assistant. I did manage to get this information by interfacing with the car directly. To see how I did that, have a look at: How to Integrate Your Chery Tiggo 8 PHEV with Home Assistant.
The TellusPower Measurand/Reconnection Problem
During our testing, enabling every available measurand resulted in Home Assistant attempting to configure the charger with a very large MeterValuesSampledData list.
Although the TellusPower charger acknowledged the configuration request with an Accepted response, it failed to respond correctly when Home Assistant queried the configuration afterwards. The charger then restarted its OCPP connection and performed a new Boot Notification.
Typical log output looked like:
ChangeConfiguration -> Accepted

GetConfiguration(MeterValuesSampledData)

...

BootNotification
This resulted in a continuous reconnect cycle.
Reducing the number of requested measurands resolved the issue immediately.
You Can Always Add More Later
If you later decide that you need additional measurements, add them one at a time and confirm that the charger reconnects successfully before enabling the next one.
This makes it much easier to identify whether a particular measurand or firmware limitation is causing instability.
Understanding Heartbeats
Two settings are commonly confused:
HeartbeatInterval
This is an OCPP message.
The charger periodically sends a Heartbeat request to confirm it is still connected and to synchronize its internal clock.
Typical values are:
- 300 seconds
- 600 seconds
- 3600 seconds (factory default on many chargers)
Our TellusPower charger shipped with:
HeartbeatInterval = 3600
The charger also supports changing this value because the configuration is reported as writable.
In my setup, I use 300 seconds for the Heartbeat interval and 30 seconds for the WebSocket ping interval.
WebSocketPingInterval
This is not an OCPP message.
Instead, it is a WebSocket keep-alive mechanism used to keep the TCP connection open and detect broken network connections.
Recommended setting:
WebSocketPingInterval = 30 seconds
Unlike Heartbeat messages, WebSocket Pings generate very little traffic and help maintain a reliable connection.
Understanding Meter Values
One of the biggest advantages of OCPP is receiving detailed measurements from the charger.
These can include:
- Voltage
- Current
- Power
- Energy Imported
- Energy Exported
- Power Factor
- Frequency
- Temperature (if supported)
The OCPP integration allows Home Assistant to configure which supported measurands the charger reports.
A TellusPower Quirk
During testing we observed an interesting behaviour.
The charger successfully accepted a request to configure its MeterValues measurands, but when Home Assistant immediately queried the configuration to verify the change, the charger reset its OCPP connection and performed a fresh Boot Notification.
The logs showed:
ChangeConfiguration -> Accepted
GetConfiguration

...

BootNotification
This appears to be a firmware-specific behaviour rather than a Home Assistant issue.
Fortunately, the integration recovers automatically by accepting the new connection and continuing normal operation.
If you experience repeated reconnects, try reducing the configured list of requested measurands to determine whether a specific measurement is triggering the reconnect.
Building Home Assistant Dashboard
I am not the best dashboard designer.. I normally use what is available, and as time goes by I will optimise or upgrade to better looking cards on the Dash.
For a start with the TellusPower Charger integration, I created my Chery Home Assistant Dashboard to contain the following:
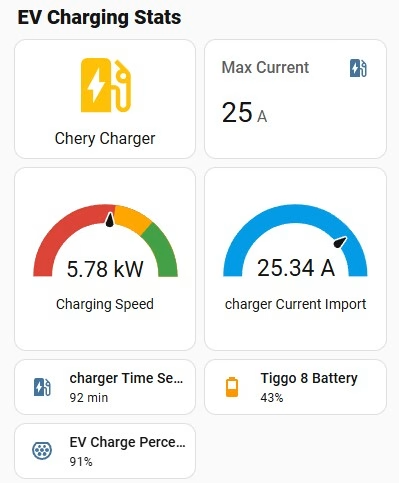 | – Chery Charger – This is my button to start / stop charging. – Max Current – Allows me to manually (and dynamically) change the maximum current that the Charger should use. This will later be replaced by automations based on Solar availability. – Charging Speed – This gauge is just to show the amount of kW going out from the Charger. – Charger Current Import – Another Gauge to show the amount of Amps. – Charger Time Session – The duration of the current charging session. – Tiggo 8 Battery – This is available by integrating the CarLinko Application as described in How to Integrate Your Chery Tiggo 8 PHEV with Home Assistant – EV Charge Percentage – This is a helper that I created for an Automation. This allows me to set the max Charge Percentage so that the Charger will stop when this is reached. (I prefer to not always charge to 100% in order to protect the battery) |
| I also created some statistics around the charger to indicate how much I am charging daily. This shows the current session energy, as well as the Daily and Monthly energy consumption. | 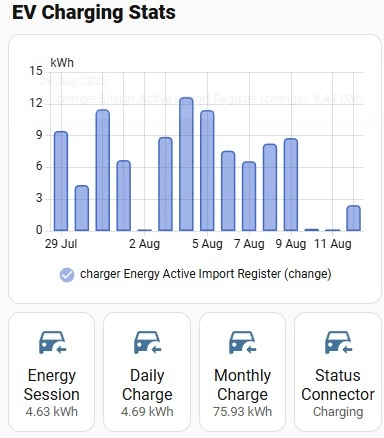 |
| Another Card to integrate this into my Garage. Here I used the “Room Summary Card” to pull together all the statistics of my garage from the Garage Controller as well as the Charger details for a single view. It allows me to see the temperature, humidity, ambient light, door open count as well as the door and charging status. | 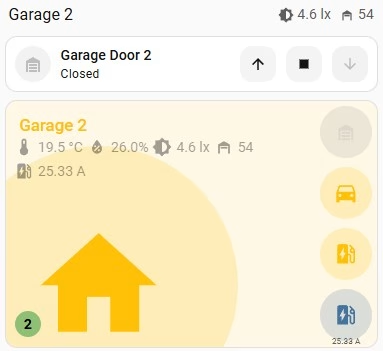 |
Troubleshooting
Charger never connects
- Verify the Home Assistant IP address.
- Confirm the configured port matches the OCPP integration.
- Ensure any firewalls allow inbound TCP traffic on the configured port.
- Check that the charger is configured for OCPP 1.6J.
Charger continuously reconnects
Enable debug logging and look for:
BootNotification
appearing repeatedly.
If reconnects occur immediately after configuration requests, the charger firmware may be restarting its OCPP service.
No measurements appear
Verify that:
- Meter Values are enabled.
- The charger supports the requested measurands.
- Charging is actually in progress (many chargers only report power while actively charging).
What Can You Automate?
Once connected, Home Assistant opens up a range of possibilities:
- Charge only when solar generation exceeds household consumption.
- Reduce charging current when the home’s total load becomes too high.
- Stop charging when battery storage reaches a specified reserve.
- Schedule charging during off-peak electricity tariffs.
- Receive notifications when charging starts, stops, or completes.
- Display real-time charging information on your Home Assistant dashboard.
- Track charging status on Home Assistant Dashboard
What’s Next?
In future articles we’ll build intelligent charging automations that:
- Charge only from excess solar
- Automatically adjust charging current
- Pause charging during load shedding
- Prioritise home battery charging
- Display charging costs in Home Assistant
Once you’ve connected your TellusPower charger using OCPP, these automations become surprisingly straightforward.
Tested With
This guide was developed using:
- TellusPower DualPortLevel2
- Firmware 001238
- OCPP 1.6
- Home Assistant
- OCPP integration installed through HACS
Note: Menu names and available settings may differ between charger firmware versions.
Final Thoughts
Using OCPP transforms the TellusPower charger from a standalone appliance into a fully integrated part of your smart home.
Because communication is local, responses are fast, reliable, and independent of cloud services. Combined with Home Assistant’s powerful automation engine, this enables intelligent EV charging strategies that can reduce electricity costs while making the most of available solar energy.
While we did encounter a firmware quirk relating to configuration verification, the charger otherwise communicated well using OCPP 1.6 and exposed all the functionality needed for advanced Home Assistant automations.
If you’re already using Home Assistant to manage your home energy system, integrating your EV charger is one of the most rewarding additions you can make.
Leave a Reply